

How To Connect Camera On Macbook Air Facetime
'I upgraded my MacBook to Big Sur. Since then the photographic camera is non working. I cannot apply photographic camera in FaceTime, Teams, iChat, or other apps. How to fix camera not working in macOS Big Sur? Please help.'
Mac built-in camera not detected or stopped of a sudden is commonly reported after diverse macOS upgrades. The issue has come up with Large Sur too.
Since camera is the most used app of Mac, it is abrasive when information technology stops working suddenly. You employ it for taking photos, video calls, chats, or meetings. In that location are many apps on Mac, such as FaceTime, Messages, Photo Booth, etc., that use the born photographic camera.
Addressing the issue, here nosotros bring eleven methods to troubleshoot the problem.
Method 1: Restart the app to set up camera not working
Attempt restarting the app in which the photographic camera is non working on macOS Big Sur. In whichever app yous are facing the effect, close it using Cmd+Q and restart it equally normal.
Method ii: Restart your Mac
Minor system glitches may too cause photographic camera app issue. You tin can fix this by restarting your Mac organisation. Shutdown the car. Wait for few seconds, and then restart your Mac.
Method iii: Update the macOS
Once update your macOS Large Sur. Software updates tin can gear up the problems related to built-in apps such as Camera, FaceTime, Safari, Photograph Berth, and others.
Steps to update macOS:
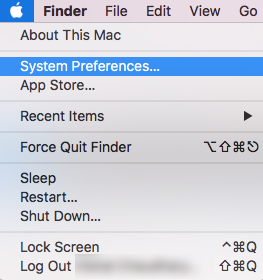
- Open Apple menu.
- Become to Arrangement Preferences > Software Update.
- If any updates are bachelor, click Upgrade At present.
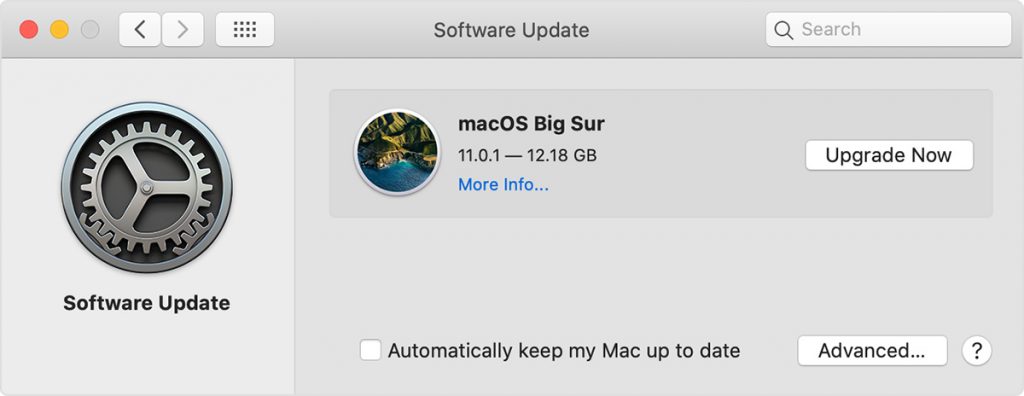
You can as well check in the box 'Automatically keep my Mac up to date' to automatically update the installed apps.
Method four: Allow camera access on Mac
If your photographic camera is not working subsequently Big Sur update, check and reset your Mac photographic camera permissions. macOS Big Sur might have regulated photographic camera admission for FaceTime, Photo Booth, or Zoom, etc.
Follow the below steps to allow camera admission for any app on macOS:
- In the Apple carte du jour, click on the apple tree icon.
- Select and navigate to System Preferences > Security & Privacy > Privacy tab.
- Click on Photographic camera on the left side bar.
- Select the checkbox for the app you lot want camera access. Close the window.
- Now open the app and see if the camera is working.
Method 5: Check your Mac's camera indicator low-cal
When an app does not detect the built-in camera of Mac, check the camera indicator light. If it flashes dark-green, contact Apple tree. It could be a camera hardware upshot.
Method vi: Modify your antivirus settings
Accept you installed an antivirus on your Mac? Check and change the settings of your antivirus. The software might be restricting camera access for certain apps.
Method 7: Remove apps Screen Time limit on macOS Big Sur
Is your Mac camera working in another app? For case, if camera is not working with FaceTime, cheque if it is opening with iChat or Photo Booth. If the photographic camera is working with other apps, attempt resetting Screen Time of apps.
The 'Screen Time' feature of Mac helps to regulate the fourth dimension spent on apps and websites. If you take set the time limit for an app that uses camera, and so also, your camera volition not work beyond that time.
So either ensure the apps that use camera include enough usage fourth dimension or remove screen time limitation.
Steps to remove Screen Fourth dimension limit of apps on macOS Large Sur:
- In the Apple card, click on the apple icon.
- Select Arrangement Preferences > Screen Time.
- Click on Content & Privacy in the sidebar.
- Click Apps tab.
- Select the checkbox for Camera to use your camera.
- Click App Limits in the sidebar.
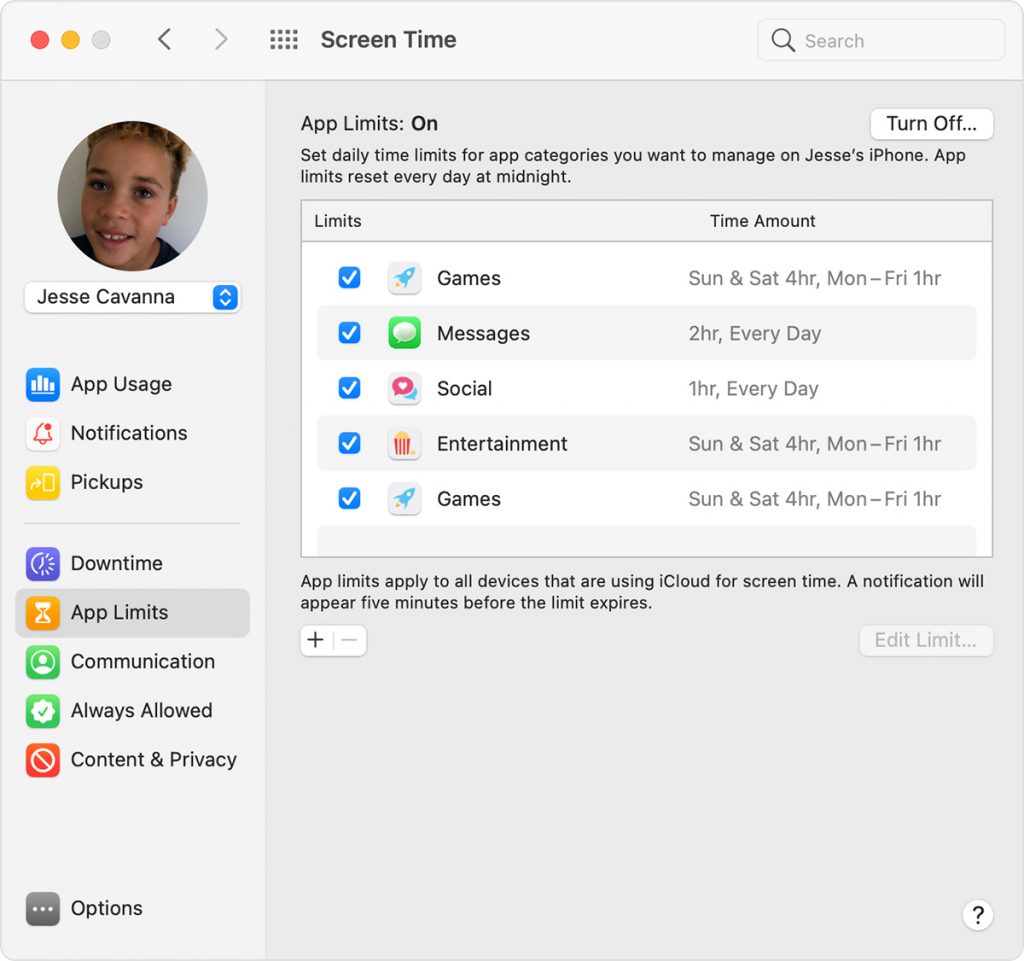
- Deselect the checkbox for Limits for the app you desire camera access.
- Adjacent, reopen the Camera app to apply the settings.
Method viii: Check if the Photographic camera app is detected by Mac
Your camera should be detected past Mac to work properly. If Mac does not notice it, it could exist a hardware event that needs to be repaired by Apple.
Steps to check if photographic camera is detected by Mac:
- Select the Apple menu icon.
- Select Nearly This Mac.
- In the Overview tab, select System Study.
- Go to System Information menu. Click on the Hardware.
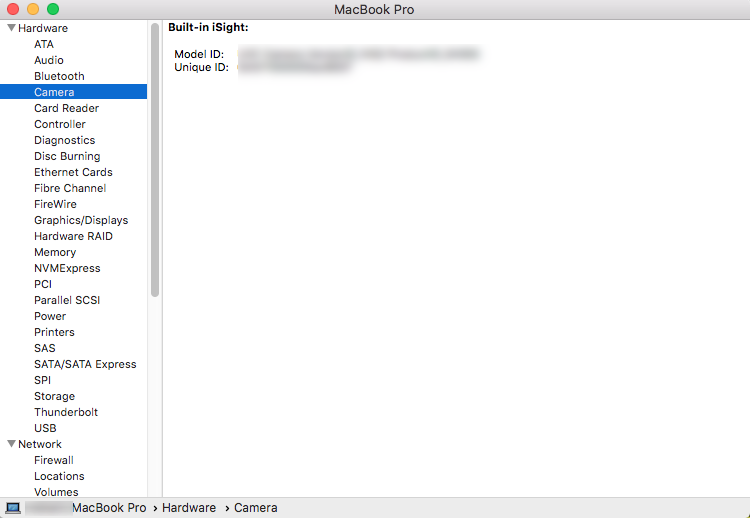
Select Camera. On the right pane, camera data – model ID number are displayed.
If you don't notice this information, it means Mac does not detect your camera. That'due south the reason your camera is not working in Big Sur. Contact Apple to fix the issue.
Method 9: Use VDCAssistant Command
If you are facing 'no connected camera' error on Mac it can be due to the VDCAssistant. When you open a plan that uses camera, the macOS runs VDCAssistant groundwork process that manages the camera controls.
Sometimes, the VDCAssistant process continues despite closing the app using the camera to prevent further camera connections with apps on your Mac.
However, yous can fix the camera error using the sudo killall VDCAssistant command in Mac Terminal.
Steps to employ VDCAssistant command to gear up camera not working on macOS:
- Close all tabs and apps on your Mac and open up Final window using Spotlight.
- Type the given command line: sudo killall VDCAssistant;sudo killall AppleCameraAssistant
- Add the Administrative password to complete the procedure.
At present again launch the app showing 'no camera error' and see if the problem is stock-still.
Method 10: Reinstall macOS to fix camera not working
If the camera app is not working later on upgrading Big Sur, reinstall the macOS. Use the born macOS Recovery on Mac that maintains files and user settings while reinstalling.
Before using macOS Recovery, know what blazon of Mac you have — Apple silicon or Intel-based.
Steps to find which blazon of Mac you have:
- Select Apple bill of fare icon.
- Choose Virtually This Mac.
- In the Overview pane, bank check the label Processor clarification. Depending on the processor blazon - Apple silicon or Intel follow the reinstall macOS steps given hither. Ensure continuous cyberspace connection while reinstalling macOS.
Steps to open up macOS Recovery on Apple silicon system:
- Turn on your Mac and connect your Mac to the Internet.
- Press and agree the power push until the startup options appears.
- Click on the gear icon labeled Options, then click Go along to open up Recovery Mode window.
Steps to open macOS Recovery on Intel-based system:
- Turn on your Mac and connect your Mac to the Internet.
- Printing and concord Command -R until yous see an Apple tree logo or earth image.
- Wait until your Mac opens the Recovery Style window.
Method eleven: Create a new user business relationship
Another way to overcome photographic camera not working in Mac Big Sur is to create a new user account.
Steps to create new user account on Mac:
- Become to the Apple logo on Mac.
- Click on System Preferences > Users & Group.
- At the bottom, click on the lock icon to unlock the preference pane.
- Click on the + icon at the bottom left.
- Click across the New Account and cull Administrator every bit a type of user.
- Enter other details – Full name, Account Name, and Countersign.
- Click Create User button.
Restart your Mac and login into this new business relationship. The macOS Large Sur camera non working issue should be stock-still.
Lost photos and videos after upgrading to macOS Big Sur?
Data loss after upgrading to Large Sur is common. Many accept reported loss of consummate folders of photos and videos from their MacBook. Unfortunately, if you have experienced media files loss afterwards upgrade to Big Sur or camera app bug, use a photo recovery tool that supports Big Sur. Here nosotros recommend Stellar Photo Recovery for Mac that supports recovery from the latest macOS. You lot can compensate all your lost photos, videos, and music files missing from Mac after upgrade, formatting or macOS reinstall, etc.
Get the costless trial and preview the recoverable photos and videos before saving.

Conclusion
Hope you lot found the mail service helpful. One of the above methods should surely ready camera not working in Large Sur. Just in case if it doesn't, chances are the trouble is hardware-related. Contact Apple support to get the Mac congenital-in camera repaired.
Source: https://www.stellarinfo.com/article/fix-camera-not-working-mac-big-sur.php
Posted by: martinhaddince.blogspot.com
0 Response to "How To Connect Camera On Macbook Air Facetime"
Post a Comment